
Approval Workflow
A pay app moves through a fixed set of statuses, with role-gated actions at each step. A workflow stepper on the detail page shows where it stands and who acted.
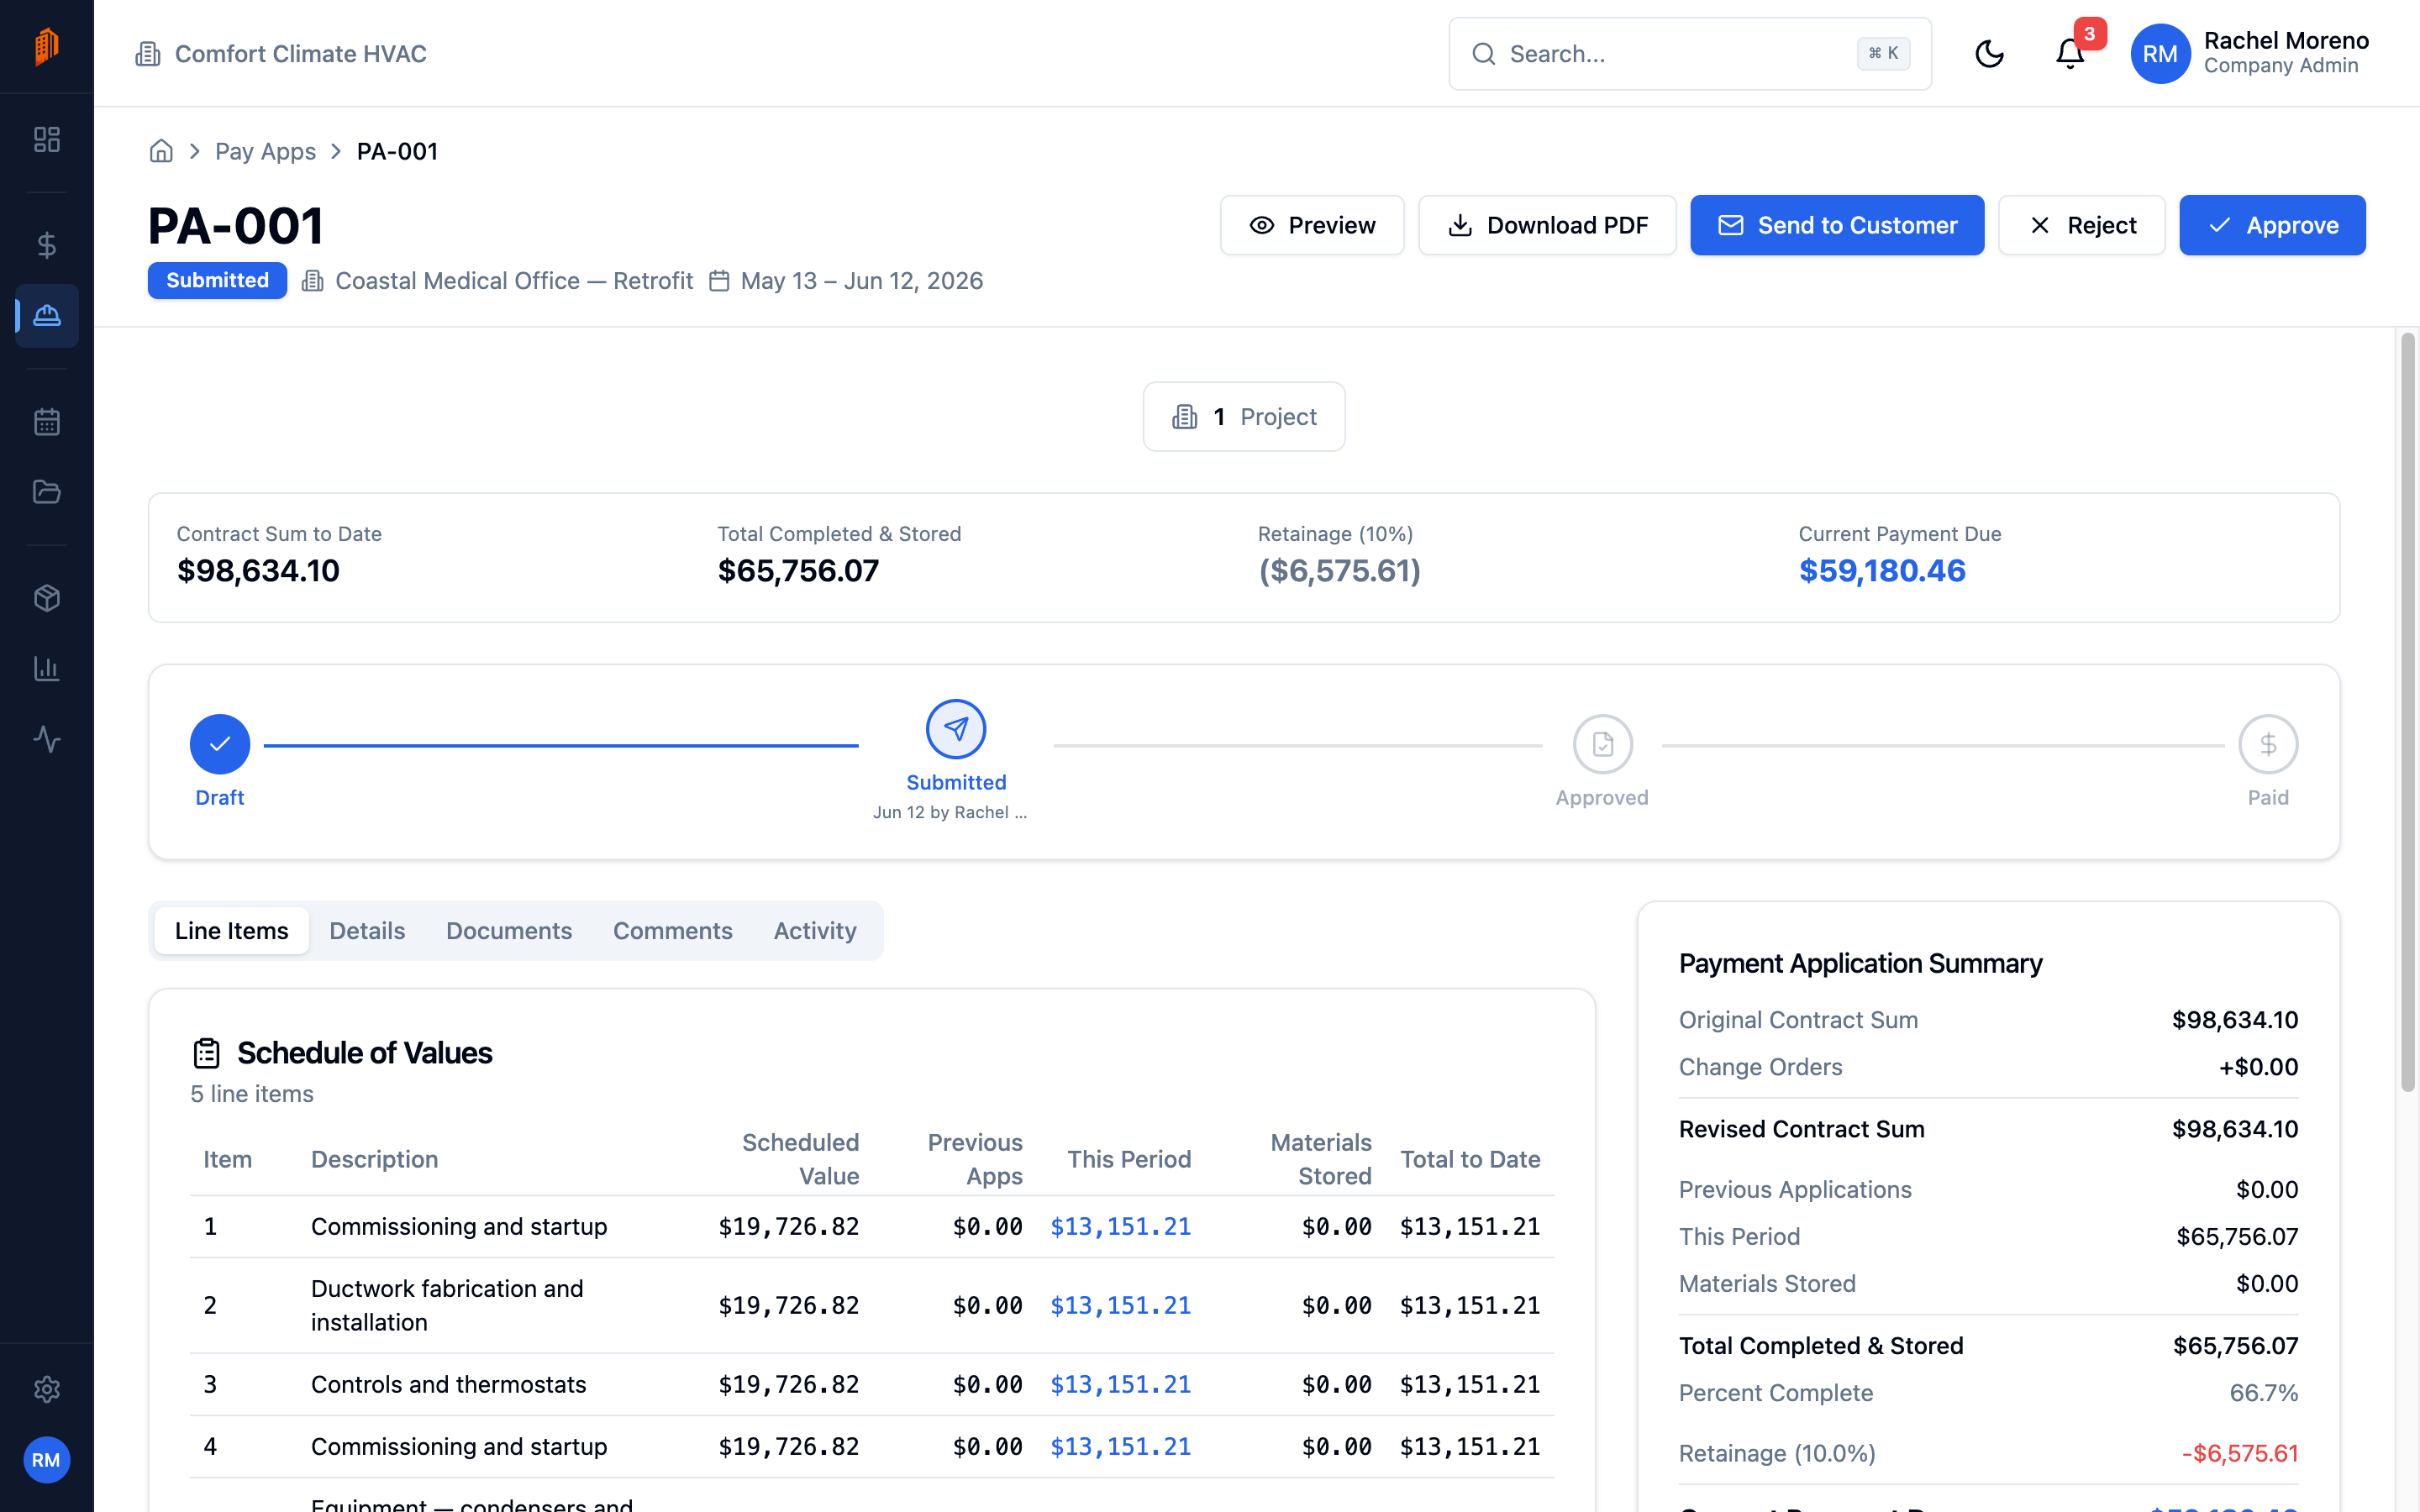
The approval workflow: a submitted pay app shows the Draft → Submitted → Approved → Paid stepper, with Approve and Reject in the header and the Payment Application Summary the approver reviews.
Pay app statuses
Section titled “Pay app statuses”- Draft – being prepared and edited.
- Submitted – sent for approval.
- Approved – approved for payment.
- Rejected – sent back with a reason.
- Paid – payment recorded.
A pay app can go straight from Draft to Approved, or be rejected back to Draft.
Submit for approval
Section titled “Submit for approval”-
Finish the SOV. Confirm this period’s progress is entered.
-
Submit. Click Submit for Approval. The pay app moves to Submitted and locks for editing.
Approve, reject, or mark paid
Section titled “Approve, reject, or mark paid”-
Review. Open the submitted pay app and check the schedule of values.
-
Decide. Click Approve to approve it for payment, or Reject and enter a Rejection Reason to send it back.
-
Record payment. Once approved, click Mark as Paid when payment is received.
What’s next
Section titled “What’s next”- PDF and email – send the pay app to your customer.
- Schedule of values – report progress before submitting.